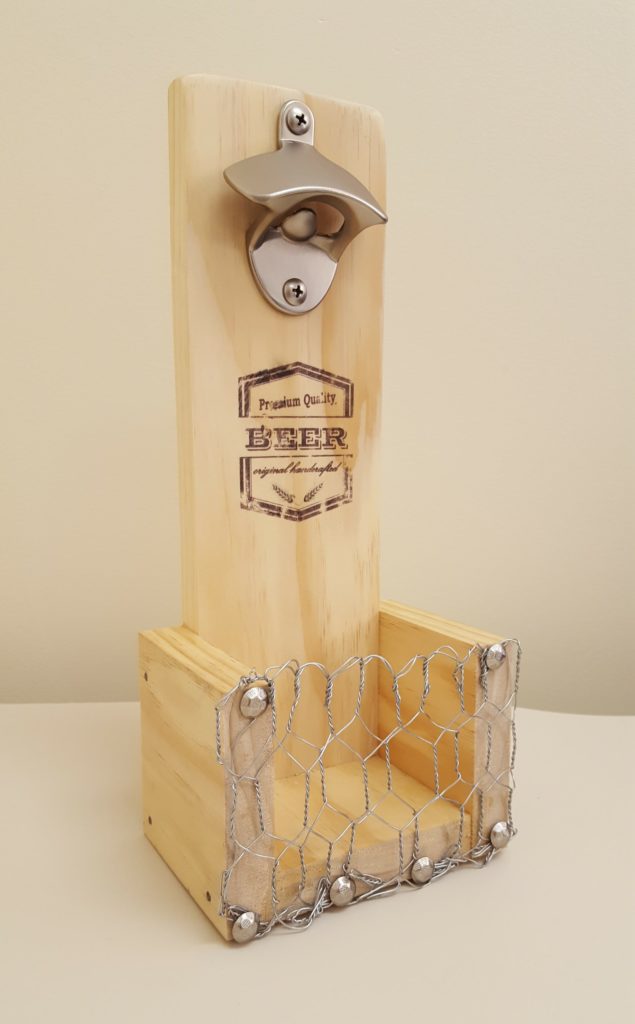
Funny Diy Beer Opener Wall Mount
Hey all, thanks for stopping by Bitterroot DIY!
For more project ideas, you can find me on Pinterest. And to stay up to date with the latest shenanigans, follow me on Instagram.
How about a fun little project you can complete in an evening – the custom wall mounted bottle opener! These are great as gifts or to add some décor to a bar area, man cave, garage, porch, etc.
Sidebar for a second: I'm not sure if I've mentioned our favorite couch yet, but it is one of the classiest pieces of furniture we own. Found on craigslist for $40, we added some wheels and gave it a permanent home in the garage. Think 70's brown plaid, removable cushions, smooth rolling wheels, lots of cushiness (is that a thing?) … she's basically a Cadillac.
The garage has become the hangout place since we got that lovely couch. Our townhouse doesn't have a yard or porch, and the patio is just big enough for a grill. So we'll open up the garage door, pull the couch up to the driveway, and watch the sun go by … classiest setup ever.
Well, since spring is right around the corner and we'll be hanging out there quite a bit, I thought we should probably have a bottle opener handy. And why not add a little decoration to the garage while we're at it!
So, here we go: wall mounted bottle opener.

Tools & Materials:
- 1 x 4 Scrap Pieces
- Chicken Wire
- Decorative Push-Pins
- Wood Glue
- Small Nails
- Hammer
- Custom Graphic
Cuts:
- 1 | 1 x 4 @ 12" (platform)
- 2 | 1 x 4 @ 3 1/2" (cap catcher sides)
- 1 | 1 x 4 @ 2 7/8" (cap catcher base)
Step 1.
Complete the cuts for your bottle opener frame.

Add wood glue to the cap catcher sides, attach bottle cap catcher sides to the platform. Line the sides up so they are flush with the bottom of the platform. Clamp and let sit for approximately 30 minutes.

You can wipe off excess glue with a damp rag after the glue sets. Stain will not stick to wood glue, so make sure to wipe away as much of it as you can (if you're planning to stain). I had such a mess of glue going on (as you can see in the picture) that I had to do some sanding after I got the whole thing put together to get it all off … oops …
Once the glue sets, nail the sides of the cap catcher down for extra durability (this is optional). Any finishing nailer or brad nailer would work wonderfully here. If you want to keep it classic … I used a hammer and small nails.
When it's all said and done, you'll have something looking like this:

Step 2.
Attach bottle cap catcher base to the sides and platform with wood glue. Apply wood glue to all 3 sides of your base that will attach to the platform.

Squeeze the base in between the sides, clamp, and let sit for approximately 30 minutes.

Make sure the cap catcher base is flush with the bottom of each side as well as the platform. It's a pretty tight fit to get the base in-between the sides. A lot of the glue squeezes out when you push the base into place, but it should still be plenty secure. I added some nails in the sides again because I tend to over-build things and I like my hammer and nails. This is up to you.
Again, wipe off any excess glue.
Step 3.
Add a fun decal to the platform.

I used a wax paper transfer. If you're interested, check out this great tutorial from Karen at The Art of Doing Stuff.
Step 4.
Attach chicken wire to the front of the bottle cap catcher with decorative push-pins to complete the box.
Not gonna sugar-coat it … this was quite a process. I had 1″ chicken wire from Hobby Lobby, which was a little too wide for bottle caps. So I ended up folding a piece in half to create smaller gaps.
Start by cutting out the size you want x 2:

Fold your wire piece in half and twist the ends together to hide the sharp wire ends. I poked my hands up quite a bit, so be careful with all that wire … it bites.

Position the wire on the front of your cap catcher as desired and pin in place. I started with the bottom pins:

Then stretched and bent the wire until I liked it and added the top pins:

The bottom of the chicken wire looked pretty shoddy and left a small gap in the base, so I added a couple more push-pins for quality and aesthetics.

Step 5.
Since I added the wax-paper transfer decal, I sealed the whole project with an acrylic spray for extra protection. If you want, you could stain/paint your piece.
Step 6.
Attach bottle opener. I found a nice bottle opener at Menards that matched my chicken wire and decorative pushpins. You can find them at any hobby/craft or hardware store. They're also online at Amazon.

And that's all she wrote! I think it's BEER : 30.
Please leave any questions and I'll get back to you as soon as possible!
![]()

Source: https://www.bitterrootdiy.com/wall-mounted-bottle-opener/
0 Response to "Funny Diy Beer Opener Wall Mount"
Post a Comment